


.jpg)


The Best Hackintosh Laptops Of 2012 – For Lion
The Best Hackintosh Laptops Of 2012 – For Lion
SEE ALSO: The Best Hackintosh Laptops of 2012 – For Mountain Lion
It’s very difficult to find a laptop that can easily be turned into Hackintosh. As mentioned in our Hackintosh compatibility guide, most laptops aren’t good Hackintoshes, because the compact design of laptops makes it very difficult to replace non-compatible parts.
With this in mind, I’ve compiled a list of Hackintosh-compatible laptops, all of which can run Mac OS X Lion without the need to replace any hardware. Some of these laptops were chosen because they were exceptionally compatible with Mac OS X, while others were chosen because they had a large Hackintosh community backing them. Most of the guides provided below are from tonymacx86, and have files attached to them. To view and download attached files on tonymacx86, you have to register an account on the website.
LATEST UPDATE (September 22, 2012): Added the Lenovo G470 to the list. Fixed archived links to tonymacx86.
Of course, keep in mind that no laptop will ever run Mac OS X as well as a real Macbook. But some laptops can get pretty close.
HP ProBook 4530s ($500-$950)

What You Get: The HP ProBook 4530s is a standard sized laptop with a 15.6-inch screen, and a pretty great keyboard. The 4530s uses 2nd-generation Intel processors (Sandy Bridge), with models varying from the lowest-end Core i3 to the highest-end Core i7. Overall, it’s a very diverse selection. If you’re looking for a standard sized laptop, the ProBook 4530s line will probably have the right laptop for you. The battery life for the 4530s on Mac OS X is about 3 hours, which isn’t great, but it’s not a dealbreaker, either.
Hackintosh Ability: This laptop is the only one on the list that I would recommend to someone without previous Hackintoshing experience– when it comes to ease of installation, the ProBook 4530s is pretty much the gold standard. If you’ve never set up a Hackintosh before, get this laptop. It’s even endorsed by tonymacx86 himself.
Most Hackintosh laptops require a ton of extra tweaking to get Mac OS X running well, but almost everything on the ProBook 4530s works automatically. WiFi, audio, ethernet, sleep, bluetooth, USB 3.0, the battery meter, the trackpad, and the SD card reader can all be enabled within a few minutes of your initial installation of Mac OS X. Tweaking can be kept to a minimum, since the HP ProBook 4530s forum on tonymacx86 has more or less figured out everything for you. If you’re looking for a truly Hackintosh-friendly laptop, go with this one.
That being said, not everything is perfect. Bluetooth won’t work after waking up from sleep, but screen brightness controls won’t work before waking up from sleep. So you’ll have to decide which feature is more important to you. Also, Bluetooth doesn’t work after a restart (only a cold bootup will make it work), the VGA port is unreliable, and the external microphone doesn’t work at all. However, don’t let all of these problems with the 4530s discourage you; none of the problems really affect the laptop’s usability. In fact, the 4530s actually has fewer problems than most Hackintosh laptops. It just happens that the glitches for the 4530s are better documented.
Resources: Snow Leopard install guide | Lion install guide | Forum | FAQ
HP ProBook 4430s ($500-$700)
What You Get: The ProBook 4430s is the smaller brother of the 4530s. While the design and most of the technical specifications are identical, the 4430s uses a slightly smaller 14-inch screen. Additionally, while the 4430s can use both Intel Core i3 and Core i5 processors, there aren’t any models with Core i7. With such a compact screen, this laptop begs a comparison to the 13-inch Macbook Pro. In most aspects, the 4430s and the 13-inch Macbook Pro are essentially equal. However, the lower price of the 4430s comes with its own costs: remember that ProBooks usually only get about 3 hours of battery life on Mac OS X, while the Macbook Pro tops off at nearly 7 hours.
Hackintosh Ability: The ProBook 4430s lives up to the Hackintosh-friendly reputation of the HP ProBook line. Compatibility-wise, the 4430s is just as good as the highly-regarded 4530s: all of the laptop’s features work with little to no effort. However, like all ProBooks, the ProBook 4430s has issues with bluetooth and brightness controls, and the VGA port and external microphone don’t work.
Resources: Snow Leopard install guide | Lion install guide | FAQ
The 4430s isn’t a very popular Hackintosh laptop, so there aren’t many Hackintoshing guides about it. Fortunately, Hackintoshing guides for the ProBook 4530s (linked above) usually work for the 4430s without any trouble.
HP ProBook 4730s ($800-$1100)
What You Get: The ProBook 4730s is a larger, higher-end version of the ProBook 4530s. Unlike the 4530s, the 4730s has a 17.3-inch screen, so it’s large enough to replace your desktop computer. In addition, the ProBook 4730s uses higher-end parts; every model of the 4730s uses either a Core i5 or Core i7 processor. The 4730s also uses a discrete graphics card (the AMD Radeon 6490M) instead of the processor’s built-in HD 3000 graphics.
Hackintosh Ability: The ProBook 4730s mostly works with Mac OS X Lion, but it’s not nearly as Hackintosh-compatible as the 4530s. The graphics card in the 4730s (the AMD Radeon 6490M) doesn’t work with Mac OS X, so you’ll have to disable it in the BIOS. This isn’t a huge loss, but it’s inconvenient, and it definitely complicates the installation procedure. The 4730s also has problems displaying Mac OS X at the correct screen resolution, since it uses a different resolution (1600×900) than other ProBook models.
Most importantly, this laptop sometimes experiences graphical glitches in Mac OS X, that prevent you from using Mission Control or the Dock. Though it’s not hard to work without the Mission Control and the Dock, it’s extremely annoying, so keep this in mind. Otherwise, everything else (WiFi, audio. ethernet, trackpad, etc.) should work pretty well. Like all of the ProBooks, the 4730s has problems with bluetooth, brightness controls, the VGA port, and the microphone.
Resources: Snow Leopard install guide | Lion install guide | Improved Lion Install Guide | FAQ
The first two links are for the HP ProBook 4530s, but the installation procedure for the 4730s is pretty much the same. The third link is a mini-guide that’s adapted specifically for the 4730s (though I recommend that you read the first two links beforehand).
Lenovo G470 ($500)

What You Get: Specifications-wise, the 14-inch Lenovo G470 laptop is rather similar to the previously mentioned HP ProBook 4430s. After all, both laptops use 2nd-generation Intel processors (ranging from the low-end Core i3 to the mid-end Core i5), and both use Intel HD 3000 graphics. The main differentiating features of the G470 are its excellent Lenovo-style keyboard, and its option to replace the built-in HD 3000 graphics with a slightly better AMD Radeon HD 6370M graphics card. For Hackintoshing purposes, however, you’ll want to purchase a G470 model that uses an i5 processor and HD 3000 graphics.
Hackintosh Ability: Setting up Mac OS X on the Lenovo G470 is not totally straightforward. Fortunately, the standard Unibeast installation method works. After the initial installation, all you have to do is run Multibeast once and install a few extra extra kext files. From there, almost everything will work properly: graphics, WiFi, ethernet, Bluetooth, sound, trackpad gestures, the battery meter, and even the Fn keys on the keyboard. The laptop does not automatically go to sleep when you close the lid, but you can still sleep manually (by clicking the “Sleep” button in the Apple icon menu, at the top-left of Mac OS X). The webcam also works, though it apparently suffers from brightness issues. The only parts of the laptop that don’t work at all are the SD card reader and the brightness controls, neither of which is a major issue.
The biggest problem with the Lenovo G470 is the lack of easy-to-follow guides for it. Luckily, the process is reasonably brief: first, install Mac OS X Lion on your G470 with Unibeast. Download the DSDT file and some extra kexts (linked below in “Post-Installation Files”). Unzip the downloaded archive by double-clicking on it; a folder will appear. Drag the file “DSDT.aml” out from the folder, onto the desktop of Mac OS X. Run Multibeast and select these following options (choose whichever version of Patched AppleIntelCPUPowerManagement that applies for your copy of Mac OS X). Finally, install all of the kexts in the unzipped folder by using Kextbeast. You’re done!
Resources: Lion Post-Installation Files | Lion installation thread
Lenovo IdeaPad B570 ($500-700)

What You Get: The Lenovo B570 is an average 15.6-inch laptop with a great keyboard (like all Lenovo laptops). The specifications of the B570 are comparable to that of other recommended laptops, like the HP ProBook 4530s: you’ll find a 2nd-generation Intel processor and Intel HD graphics inside this laptop. The cheapest model of the B570 uses a Intel Celeron processor, but to enable graphics support on Mac OS X, you have to purchase a model that uses a Intel Core processor (preferably the Core i3-2330m).
Hackintosh Ability: With a good amount of tweaking, you can get everything on the Lenovo B570 to work except for the card reader. WiFi, ethernet, graphics, audio, CPU power management, battery, sleep, and the trackpad all work. The webcam does not work normally, though it works with the app CamTwist (this is a common Hackintosh quirk). However, the post-installation process for the B570 isn’t a one-click process; installing Mac OS X on this laptop is much more complicated than running Multibeast. The guide for the B570 (provided in the “Resources” section below) is very hard to read if you’re not already very familiar with Hackintoshing, so be warned.
To install Mac OS X Lion on the B570, instead of following tonymacx86′s Unibeast method, you have to set up your own specialized iAtkos USB drive (with some extra kexts and a new smbios.plist file installed). After the initial installation of Lion, you’ll have to work with nearly two-dozen separate kexts and other system files in the post-installation, since the guide for the B570 doesn’t use Multibeast. Luckily, there’s a DSDT file available for the B570, which enables audio and WiFi without the need for any more kexts. However, this DSDT only works with models of the B570 that use an Intel Core i3-2330m processor. If you have a different model of the B570, you can edit your own DSDT based off the DSDT for the Core i3-2330m model, but this is very complicated (we won’t be covering DSDT editing on this website).
Resources: Lion installation guide
There are three downloads in the Lion installation guide (linked above). The first download is an “Extra” folder for your B570, which includes a DSDT file, system files, and general kexts. The second download is a set of extra power management kexts, which allow you to run Mac OS X without using the NullCPUPowerManagement and SleepEnabler kexts (from the first download). The third download is an improved DSDT file that enables WiFi and sound, so that you don’t have to install the AppleHDA or IO80211Family kexts (from the first download).
Acer Aspire 5750G ($550-$830)

What You Get: The Aspire 5750G has (more or less) the same feature set and price as the HP ProBook 4530s: a 15.6-inch screen, a 2nd-generation Intel processor, etc. The main difference is that the 5750G uses a separate NVIDIA 540M graphics card, instead of the processor’s built-in HD 3000 graphics.
Hackintosh Ability: The Aspire 5750G has a smaller support community than the HP ProBook, but it still works pretty well with Mac OS X. The biggest problem with Hackintoshing this laptop is that there isn’t any comprehensive, up-to-date guide about it. A lot of people have been able to get the 5750G running with full OS X compatibility, but the necessary information is spread throughout the 30+ page installation thread on tonymacx86.
All of the essentials, such as WiFi, audio, and the trackpad, will probably work when you install the kext pack (in the “Resources” section below). However, there are many different models of the 5750G, so full compatibility isn’t guaranteed. Enabling gestures, such as two-finger scrolling, for the 5750G’s trackpad can be particularly difficult. The 5750G’s discrete graphics card probably won’t work, so you’ll have to turn it off in the BIOS, thereby eliminating the biggest advantage that the 5750G has over similarly-priced laptops. There is a DSDT patch (how to patch a DSDT) available for the 5750G, but your results may vary. This laptop definitely isn’t a project for the light-hearted; the information is out there, but getting everything on this laptop to work with Mac OS X can be a lesson in frustration.
Resources: Kext pack | Lion install guide (archived) | DSDT patch | Trackpad kexts | Alternative audio kexts | 5750G Hackintosh thread
ASUS G53JW – A1 ($1400-$1700)

What You Get: The ASUS G53Jw is one beast of a laptop– it’s essentially a full-fledged desktop computer crammed into a laptop’s shell, and it runs Mac OS X Lion pretty well. It has the same screen size as the HP ProBook 4530s and Acer Aspire 5750G (15.6-inch), but the similarities end there. The G53Jw uses a discrete graphics card (the NVIDIA GTX 460M), and unlike most discrete laptop cards, this one actually works on Mac OS X. Other features of note include dual hard drive support, a Bluray drive, and a backlighted keyboard. Technically, the G53Jw uses older hardware than the other options on this list (so it’s not really a laptop “for 2012″), but it’ll still run faster than most of the other options on this list.
Hackintosh Ability: If you’re looking for a high-end Hackintosh laptop, the ASUS G53Jw isn’t a bad choice, as long as you’re willing to spend some time on the installation. Be sure to get the A1 model of the G53Jw if you can– this is the best supported model. There’s a guide for installing Mac OS X on the G53Jw, but it’s not a simple installation process, so you’ll need some previous Hackintosh experience to pull off this install.
With the right kexts (available in the guide linked below), you can get it up and running with almost full functionality. Graphics, WiFi, audio, sleep, bluetooth, the trackpad, and even the keyboard backlights all work. The only things that don’t work at all are the microphone, the SD card reader, and some of the Fn keys (function keys). Fn keys, microphones, and card readers are all optional components for a laptop, so depending on your needs, this might not even be a big deal.
Resources: ASUS G53Jw installation guide
ASUS G73Sw ($1400-$1800)

What You Get: The ASUS G73Sw is a larger, newer version of the G53Jw. Both laptops are part of ASUS’s line of high-end gaming laptops, and specifications-wise, they’re mostly the same: the G73Sw and G53Jw both have a Bluray drive, a backlighted keyboard, dual hard drive support, and a NVIDIA GTX 460M graphics card. The main difference is the G73Sw’s updated 2nd-generation Intel processor, which gives it a large performance boost. You’ll also notice that the G73Sw has a 17.3-inch screen, making it the largest (and heaviest) laptop on this list. The G73Sw weighs a hefty 8.5 pounds (about 3.9 kg), but if you’re not looking for portability, it can act as a powerful desktop computer replacement.
Hackintosh Ability: Unfortunately, there isn’t a comprehensive guide to setting up Mac OS X on the G73Sw, so you’ll need a lot of previous Hackintosh experience to pull off the installation. Once you finish the post-installation, most of the things work: graphics, WiFi, audio, sleep, bluetooth, and the trackpad. The keyboard backlights should work as well, though the results differ from person to person. However, like the G53Jw, the Fn keys and microphone on the G73Sw don’t work. The SD card reader built into the laptop hasn’t been confirmed to work, either. There is a DSDT patch available for the laptop on Olarila (how to patch a DSDT).
Resources: Kexts for Mac OS X Lion | Snow Leopard installation thread | Lion installation thread (archived) | DSDT Patch
In addition to these installation threads, check out the installation guide for ASUS G53Jw (in the above section). After installing Mac OS X Lion on the G73Sw, install all of the kexts from the above link called “Kexts”.
Conclusion
There are a lot more compatible laptops in the Hackintoshing world, but most of them use outdated hardware, or don’t have a coherent installation method for Mac OS X Lion. When this buyer’s guide was created in March 25, 2012, there were only 4 laptops in this list. This list is constantly expanding, as I find more laptops that fulfill these requirements. For now, keep your eyes peeled on tonymacx86′s laptop forum, as well as InsanelyMac’s own notebook forum and tutorials section.
Official AdBlock Plus app now available in the Play Store

Blocking ads on your device is moral grey area, but it’s hard to argue that it has benefits. AdBlock Plus is one of the most popular ad blocking plugins for browsers available, and it works extremely well. And luckily for Android users, an official app has made its way onto Google’s Play Store.
Most ad blocking apps right now require root, but AdBlock Plus is a little different. It’s compatible with almost all browsers in the Play Store without root, but only over WiFi. If you want ad-blocking over 3G, you’ll have to root your device. There’s just a few listed limitations to keep in mind if you install this app:
- Rooted: Blocks ads over Wi-Fi and 3G
- Non-rooted with Android 3.1 or later: Blocks ads over Wi-Fi
- Non-rooted with Android 3.0 or earlier: Some manual configuration is required. Please visit our website to learn how to setup your own proxy: https://adblockplus.org/en/android-config#proxy
- Also, Android does not allow ads to be blocked on SSL encrypted websites.
There’s still a few features missing from the bigger version of ABP, like whitelisting, but it’s a new app. I’m sure that’ll come eventually. Anybody ready to get this installed and improve your mobile browsing? Hit the download link below.
Cheap Laptop:-Asus K53SM-SX010D Laptop (2nd Gen Ci5/ 4GB/ 750GB/ DOS/ 2GB Graph) (Brown Metal)


Summary of Asus K53SM-SX010D Laptop (2nd Gen Ci5/ 4GB/ 750GB/ DOS/ 2GB Graph)
ASUS has reached new heights of innovation and quality with every product it brings to the market. The Asus K53SM-SX010D laptop is well-engineered and caters to all your needs. The laptop is loaded with an Intel Core i5 (2nd Generation) processor which greatly enhances the performance of the system. Suitable for office work and casual entertainment, this device can do it all.
Style and Portability
The design of this personal computer is classy and stylish which goes well with your work outfit. ASUS has designed this laptop with a fine finish which makes it ideal for the sophisticated man. The Asus K53SM-SX010D laptop has dimensions of 378 x 253 x 34.9 mm and weighs a mere 2.6 kg. The compactness and light weight of this device make it easy to carry around all day.
The 15.6 inch screen of this ASUS laptop has a high resolution of 1366 x 768 pixels. Together with the LED Backlight Glare Panel, the display of this laptop produces excellent video clarity and brightness. The standard keyboard that comes with the laptop is sturdy and well-spaced allowing you to type with accuracy. The touchpad located below the keyboard is smooth and responsive. Navigation is easy with the help of this pointer device.
Performance
ASUS always offers maximum benefits to the customers and the Asus K53SM-SX010D laptop is not any different. The Intel Core i5 2450M processor is one of the fastest processors in the market today. The Mobile Intel HM65 Express Chipset supports the processor in providing high performance to the user. With a clock speed of 2.5 GHz, with Turbo boost of up to 3.1 GHz, and a cache memory of 3 MB, this laptop is high in efficiency and fetches data from your system at the blink of an eye.
The system memory of ASUS device is 4 GB DDR3 and can be expanded up to 8 GB. A 750 GB SATA Hard Disk is installed in the laptop for storing all your movies, music and other relevant data. A highlight feature of this laptop is the NVIDIA GeForce GT 630M Graphics processor that offers you an intense gaming experience. The Graphics Processor has a Dedicated Graphics Memory Capacity of 2 GB DDR3.
Multimedia and Connectivity
The Altec Lansing Speakers of this ASUS laptop produces lovely audio clarity for music and other audio required applications. The internal mic and 0.3 megapixel web camera can be combined to make video calls to your friends and family.
Two USB 2.0 ports and one USB 3.0 port are attached on the sides of the laptop in order to work with multiple input devices. The HDMI and VGA ports allow you to connect the system to other devices that support video. The 4-in-1 card reader is useful to read different types of memory cards and formats. A mic in port is added in case you want to attach an external mic.
A Bluetooth 3.0 device is loaded on this laptop for allowing wireless transfer of data with other Bluetooth enabled devices. Connecting to the internet is an extremely easy process with the help of the 10/100/1000 Base T Ethernet LAN or wireless LAN.
Battery and Other Features
The 6-cell battery of this ASUS laptop provides a battery backup of up to 3 hours. Power supply to the system is done by using a 65 W AC Adapter. The Asus K53SM-SX010D laptop meets all your personal and professional needs with its vast array of features. The laptop is a perfect choice for those who admire high performance and efficiency.
Specifications of Asus K53SM-SX010D Laptop (2nd Gen Ci5/ 4GB/ 750GB/ DOS/ 2GB Graph) (Brown Metal)
| General | |
|---|---|
| Series | K53 Series |
| Part Number | K53SM-SX010D |
| Lifestyle | Gaming |
| Processor | |
|---|---|
| Processor | Core i5 (2nd Generation) |
| Variant | 2450M |
| Chipset | Mobile Intel HM65 Express |
| Brand | Intel |
| Clock Speed | 2.5 GHz With Turbo Boost Upto 3.1 GHz |
| Cache | 3 MB |
| Memory | |
|---|---|
| Expandable Memory | Upto 8 GB |
| Memory Slots | 2 (Unused Slot – 1) |
| System Memory | 4 GB DDR3 |
| Storage | |
|---|---|
| Hardware Interface | SATA |
| RPM | 5400 |
| HDD Capacity | 750 GB |
| Optical Disk Drive | |
|---|---|
| Read/Write Speed | 8x |
| Optical Drive | DVD RW SuperMulti Drive with Dual Layer Support |
| Platform | |
|---|---|
| Operating System | Free DOS |
| Display | |
|---|---|
| Screen Size | 15.6 Inch |
| Resolution | 1366 x 768 Pixel |
| Screen Type | LED Backlight Glare Panel |
| Graphics | |
|---|---|
| Dedicated Graphics Memory Type | DDR3 |
| Dedicated Graphics Memory Capacity | 2 GB |
| Graphic Processor | NVIDIA GeForce GT 630M |
| Input | |
|---|---|
| Web Camera | 0.3 Megapixel |
| Pointer Device | Touchpad |
| Keyboard | Standard Keyboard |
| Audio | |
|---|---|
| Internal Mic | Yes |
| Speakers | Altec Lansing |
| Communication | |
|---|---|
| Ethernet | 10/100/1000 Base T |
| Wireless LAN | IEEE 802.11b/g/n |
| Bluetooth | v3.0 |
| Power | |
|---|---|
| Battery Backup | Upto 3 hours |
| Power Supply | 65 W AC Adapter |
| Battery Cell | 6 cell |
| Ports/Slots | |
|---|---|
| USB Port | 2 x USB 2.0, 1 x USB 3.0 |
| Mic In | Yes |
| RJ45 LAN | Yes |
| HDMI Port | Yes |
| VGA Port | Yes |
| Multi Card Slot | 4-in-1 Card Reader |
| Machine Dimensions | |
|---|---|
| Weight | 2.6 kg |
| Dimension | 378 x 253 x 34.9 mm |
| Color | Brown Metal |
| Warranty | |
|---|---|
|
1 Year Domestic Onsite Warranty See Details
|
|
Top 5 Cloud Solutions for Smartphone Users
In the tech industry today, “cloud” is the buzzword that is taking the market by storm. While many computer users have learned exactly how beneficial cloud computing can be, it is still a relatively new field in the smartphone niche. Since smartphones are basically like small computers, it’s no stretch to think that smartphone users would benefit from having cloud access on their phones. Here are a few of the top cloud solutions for smartphone users:
iCloud
iCloud is one of the most well-known cloud solutions for smartphones. It is an Apple product and is only available for iPhone users or users of other Apple products. With iCloud, anything that you have on your iPhone will automatically become available on your computer or your other Apple devices. For example, if you take a picture on your iPhone, it will show up on your iPad or your home computer without having to do anything.
Binu
Binu is a service that makes it possible for any mobile phone to gain access to cloud services. It essentially turns any phone into a smartphone. With Binu, apps are run in the cloud and can be accessed on the phone. Data can also be stored in the cloud from the phone.
Google has a number of different services that can be integrated with cloud technology. If you have an Android phone, you can sync your contacts, appointments, documents, and other information to Google services for free. Other smartphones can also integrate into Google cloud services with the proper applications.
Dropbox
Dropbox is a cloud-based program that makes it possible to share files between a smartphone and any computer. Once the Dropbox app is on the phone, users can simply put files into it and they will immediately become available on any computer that is linked to the same account with the Dropbox program on it
Data Centers
When a company needs a large number of smartphones that can have access to cloud services, a data center may be in order. A data center is a facility that makes it possible for companies to remotely access servers that they house. Digital Realty is one example of a data center that offers this type of service. This is a large scale solution for companies who have many smartphones. With these cloud services and many more on the way, it’s possible for smartphone users to branch out and do more while on-the-go. The smartphone cloud market is just getting started, and will continue to expand in the future.
Guest Post: This article is written by Becky W. She is a freelance writer that loves to write on a number of different topics such as technology, health and sports. In her spare time she loves to try new dishes in the kitchen and maintain a healthy lifestyle.
How To Install And Run Android 4.0 On Mac, Windows PC Or Linux [Tutorial]
The mobile smartphone and tablet industry seems to have a very prominent divide, with a lot of consumers having their favorite operating system and choosing to stick to hardware which is powered by their chosen OS. Obviously fans of Apple’s iOS use the iPhone and iPad devices, whereas Android lovers have a wide range of hardware to choose from due to the fact that the OS is available to multiple manufacturers.
But what happens if you are a die hard fan of iOS, or Windows Phone but you still want to sample the delights that Android Ice Cream Sandwich has to offer? I personally am an iPhone user for the last five years and will continue to be for the foreseeable future. But after recently getting my first taste of Android, I am severely tempted to shell out for a second device so I can have the benefits that both provide. For those that can’t, or won’t, purchase a second device then why not run Android 4.0 in virtualization on your desktop or laptop in order to see the Ice Cream Sandwich experience first hand?
![]()
Android 4.0 is an operating system in its own right, but instead of running on a dual boot setup, we install and run ICS within a free of charge virtualization application known as VirtualBox. VirtualBox runs like any other application or program on your machine, but offers the benefits of being able to install a secondary OS within it which can be invoked quickly by the user. For all those die hard iOS and Windows Phone fans out there, this is a perfect way to experience the delights of Android.
Are you ready for a whirlwind journey down Ice Cream Sandwich lane? Buckle in and follow the simple steps below.
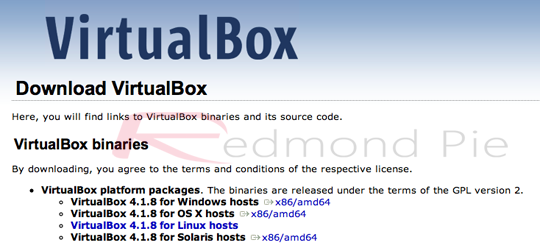
Step 1: Head over to the official Oracle VM VirtualBox site and download the relevant VirtualBox binary for your computers operating system (Windows/Mac OS X/Linux/Solaris).
Step 2: Find the saved location of the downloaded VirtualBox binary and install as you would with any other native application making sure to follow all on screen prompts and instructions.
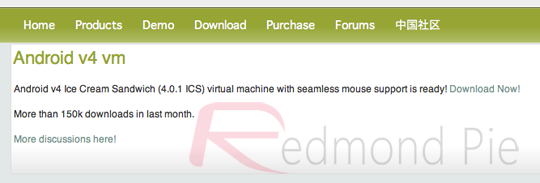
Step 3: Head on over to the VMLite website and download a copy of the Ice Cream Sandwich which has been preconfigured for virtualization and features seamless mouse support for navigation. The download weighs in at 88MB in size so may take a while to download depending on your connection.
Step 4: Locate the downloaded ‘Android-v4.7z‘ file and extract the contents from within.
Step 5: Once the Android-v4.7z file has been opened, locate a file from within the archive called ‘Android-v4.vbox‘ which as you can tell by the file extension is a pre configured VirtualBox file.
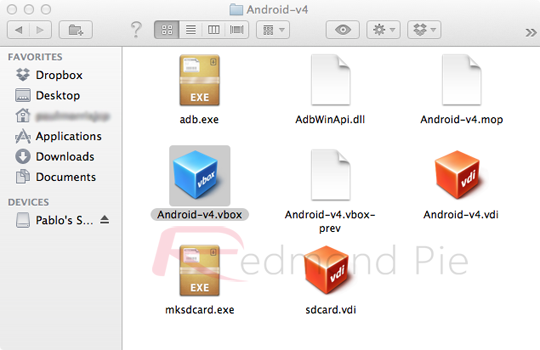
Step 6: Double click on the Android-v4.vbox file which will load the VirtualBox application and boot up the ICS file.
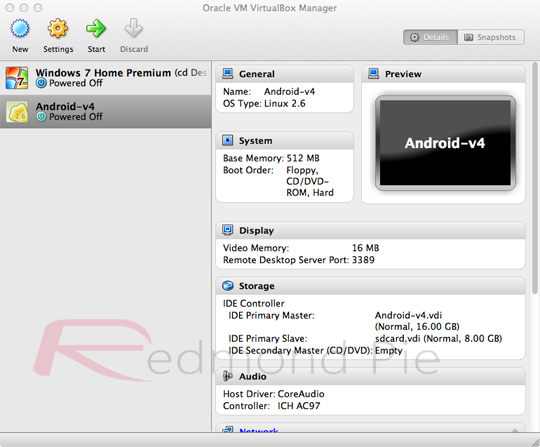
Step 7: When the boot menu is presented in VirtualBox, press ‘start‘ on the top toolbar and then if required select the ‘Android Startup from /dev/sda‘ option.
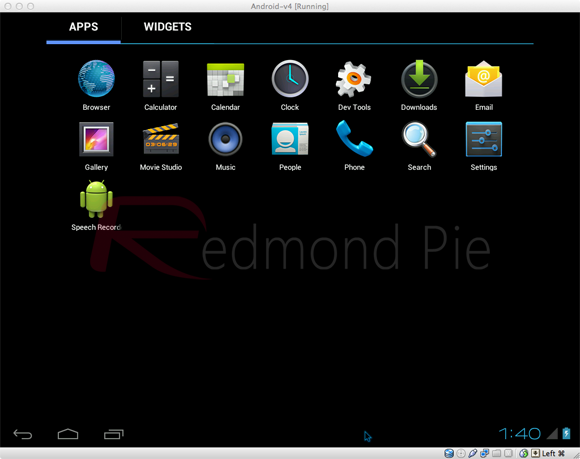
Step 8: All steps are complete. Android 4.0 ICS should now be booting up allowing you to enjoy that Android goodness.
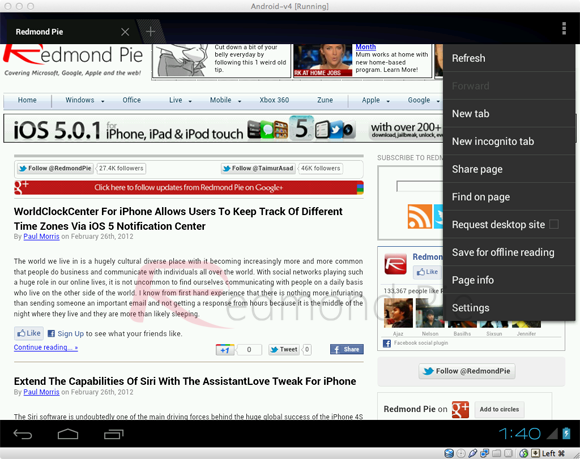
Windows and Linux users may find that an alternative, specific version Android 4.0 may be required, which can be found by visting the Android-x86 page. The performance of the Android ICS virtual installation will obviously not be as smooth as intended on an actual device built for purpose, but it does give a feel of the OS with apps being able to launch as well as widget customization.
About Me
 Howdy,World
I am an internet wreck who keep surfing the net to find the answers of the questions that i encounter,and if i get a satisfactory answer than that thing goes on this website so that if same question strikes you then you need not search the web for that.So in short we try to make your lives simpler and more advanced in the possible way we can.
WE ARE YOUR TECHNOLOGY GUIDE
Howdy,World
I am an internet wreck who keep surfing the net to find the answers of the questions that i encounter,and if i get a satisfactory answer than that thing goes on this website so that if same question strikes you then you need not search the web for that.So in short we try to make your lives simpler and more advanced in the possible way we can.
WE ARE YOUR TECHNOLOGY GUIDE Advertisement

