


.jpg)


How to install Mac OS X Lion in Virtualbox [Windows]

For the unacquainted, distros are pirated copies of Mac OS X that have been modified to work with normal computers. Right now, using a distro is the only practical method for getting Mac OS X Lion to run a virtual machine in Windows.
- Virtualbox : This virtualization suite is free, and though it doesn’t offer official support for Mac OS X, it works well enough.
- iAtkos : This is a popular distro of Mac OS X Lion. I won’t go into details, but you can download it from just about any bittorrent website by using a bittorrent client (it’s about 4 GB in size). Unlike the retail version of Lion, you don’t have to use a boot CD like iBoot to start the Mac OS X installer.
Step 1: Prep
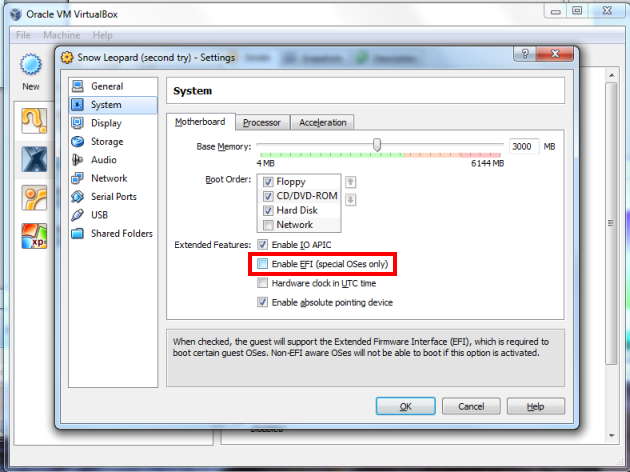
Be sure to choose 64-bit and not 32-bit, because Mac OS X Lion only works with 64-bit. Choosing 32-bit will result in a critical “Guru Meditation” error later on.

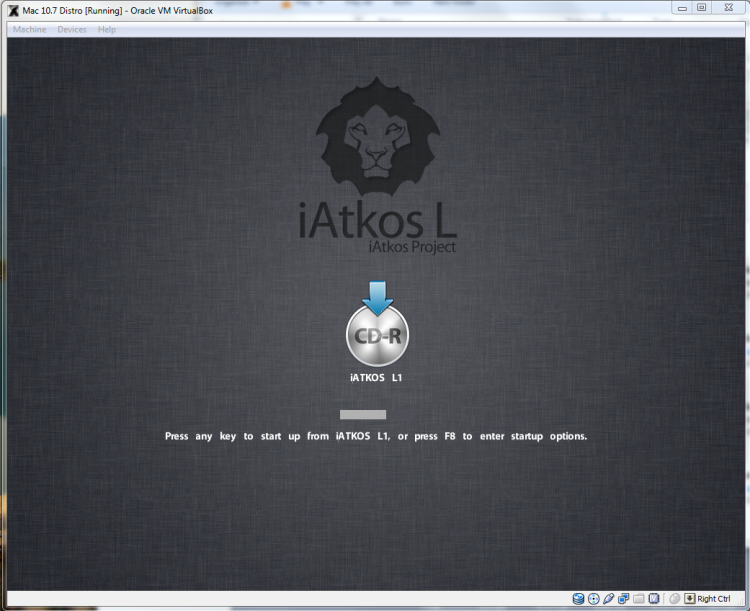
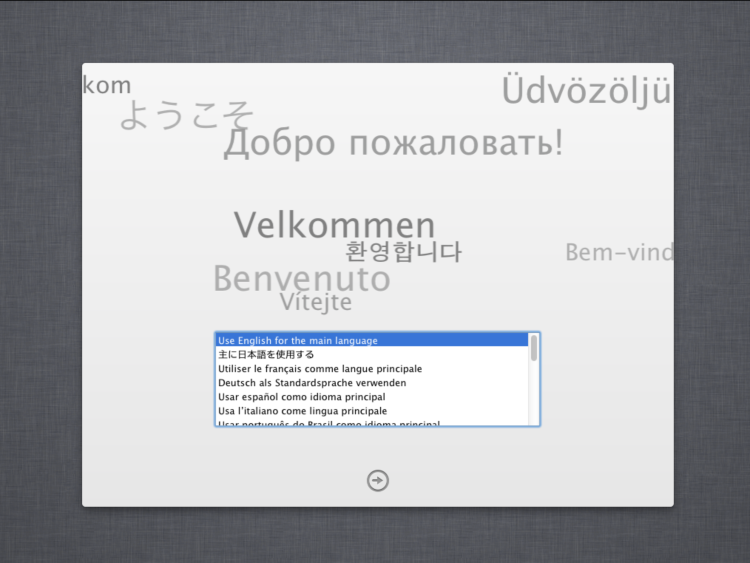
Press enter to startup the Lion installer.
Continue, and you will eventually come up to a page that asks you for a “destination” for your Mac install. Oh no, the page is blank! We’ll have to fix that. To do this, start up Disk Utility (located under the Utilities menu).
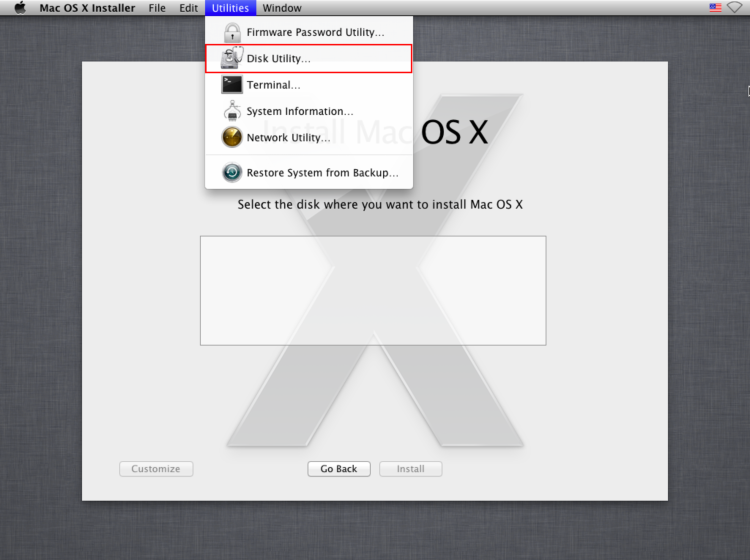
Mac OSX can only be installed on a completely clean disk, so you need to use Disk Utility to wipe your Virtualbox hard disk. Click on the Virtualbox hard disk in Disk Utility and erase it. Don’t worry, there’s nothing important on it.
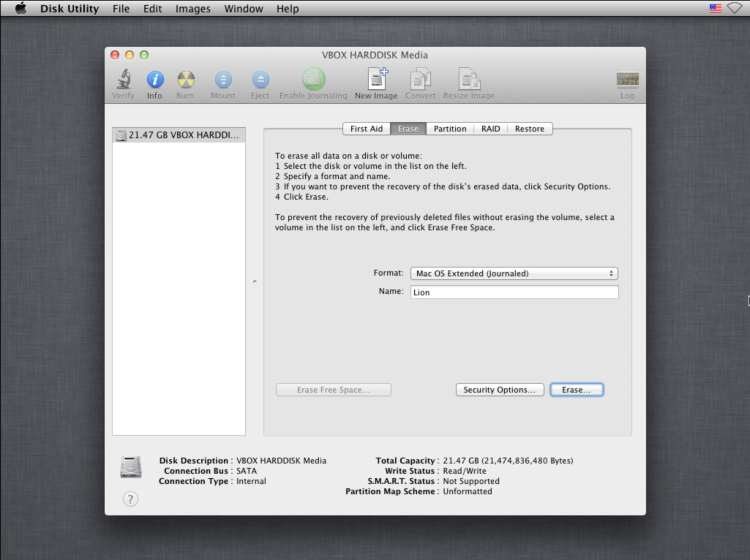
On the installation page for Mac OSX, the Virtualbox hard disk should now be showing up. Select it and continue.

Once that’s done with, Mac OSX will install itself. This will take at least 20 minutes.

When the installation finishes, Mac OS X will crash. This is normal.

Restart your virtual machine, eject iAtkos from your virtual DVD drive. To eject iAtkos, right-click on the CD icon at the bottom right of the Virtualbox window, and un-check the iAtkos DVD. (The below screenshot is different because it’s taken from my Snow Leopard guide, but it should look something like that.)

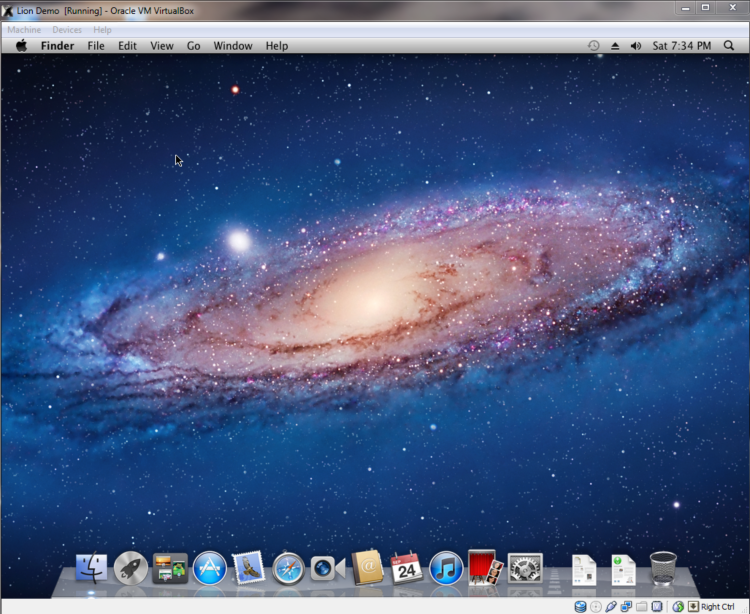
After ejecting the iAtkos CD, restart your virtual machine again. Now, at the bootup screen, you’ll see an icon for the hard drive where you installed Lion. Select it (use the arrow keys on your computer) and press “Enter”. Lion will boot, and you should eventually be led to the Mac OS X setup screen. Fill it out, then mission accomplished!
Though this step is optional, I still recommend you do it anyways. Anyways, when you first use your Mac OS X, you’ll probably notice one thing: your screen resolution is 1024×768. Since Virtualbox doesn’t “technically” support Mac OS X, there’s no official way to change this. But here’s how you can change it anyways:

You can change “1920x1080x32″ to whatever resolution best fits your monitor. For instance, if you want to use the 1600×900 resolution, type in “1600x900x32″. Once you’ve saved it, turn off the virtual machine.
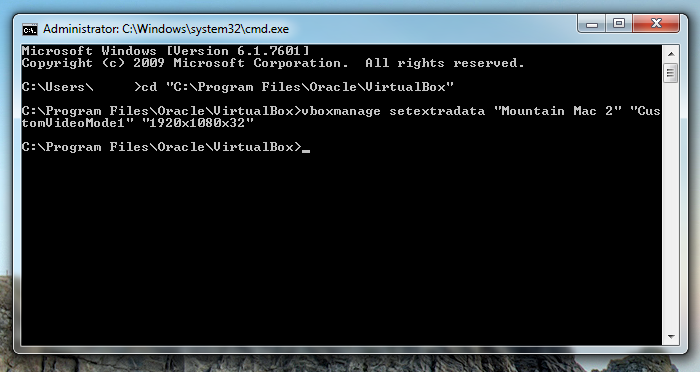
Next, open the Command Prompt in Windows. You can do this by opening the Start Menu, and typing “command prompt” into the Start Menu search bar. Then, type the following command into the Command Prompt.
cd “C:\Program Files\Oracle\Virtualbox”
This command will change the focus of the Command Prompt to the program folder for Virtualbox (if you installed Virtualbox somewhere different, then change the command to wherever you installed it). Next, type in this command:
vboxmanage setextradata “Name of virtual machine” “CustomVideoMode1″ “1920x1080x32″
This command activates “vboxmanage”, a command-line program included with Virtualbox that allows you to edit the properties of your virtual machine, including its built-in resolutions. Replace “Name of virtual machine” with the name of your virtual machine (in the screenshot below, my virtual machine is named “Mountain Mac 2″). Replace “1920x1080x32″ with whatever resolution you’re using.
Once that’s done, start your virtual machine again. It will now boot in full resolution. Congrats!

I’ll just repeat what I said in my Snow Leopard guide. Installing Mac OS X on a virtual machine is excellent practice for the real thing: installing Mac OS X on your actual computer. Don’t get too comfortable, though. Compared to most computers, Virtualbox virtual machines are very “vanilla”, meaning that they’re very compatible with Mac OS X in the first place. After all, sound and ethernet work from the start. You can’t count on being that lucky with a real PC.
And even if you don’t plan on doing this for real, with a Hackintosh, it’s still a really cool thing to try out over the weekend.
How To Install And Run Android 4.0 On Mac, Windows PC Or Linux [Tutorial]
The mobile smartphone and tablet industry seems to have a very prominent divide, with a lot of consumers having their favorite operating system and choosing to stick to hardware which is powered by their chosen OS. Obviously fans of Apple’s iOS use the iPhone and iPad devices, whereas Android lovers have a wide range of hardware to choose from due to the fact that the OS is available to multiple manufacturers.
But what happens if you are a die hard fan of iOS, or Windows Phone but you still want to sample the delights that Android Ice Cream Sandwich has to offer? I personally am an iPhone user for the last five years and will continue to be for the foreseeable future. But after recently getting my first taste of Android, I am severely tempted to shell out for a second device so I can have the benefits that both provide. For those that can’t, or won’t, purchase a second device then why not run Android 4.0 in virtualization on your desktop or laptop in order to see the Ice Cream Sandwich experience first hand?
![]()
Android 4.0 is an operating system in its own right, but instead of running on a dual boot setup, we install and run ICS within a free of charge virtualization application known as VirtualBox. VirtualBox runs like any other application or program on your machine, but offers the benefits of being able to install a secondary OS within it which can be invoked quickly by the user. For all those die hard iOS and Windows Phone fans out there, this is a perfect way to experience the delights of Android.
Are you ready for a whirlwind journey down Ice Cream Sandwich lane? Buckle in and follow the simple steps below.
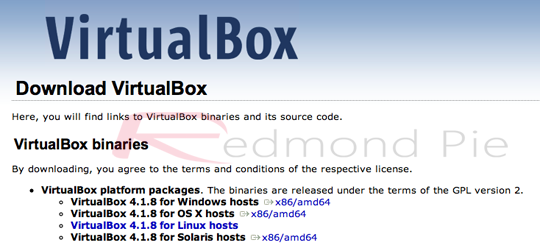
Step 1: Head over to the official Oracle VM VirtualBox site and download the relevant VirtualBox binary for your computers operating system (Windows/Mac OS X/Linux/Solaris).
Step 2: Find the saved location of the downloaded VirtualBox binary and install as you would with any other native application making sure to follow all on screen prompts and instructions.
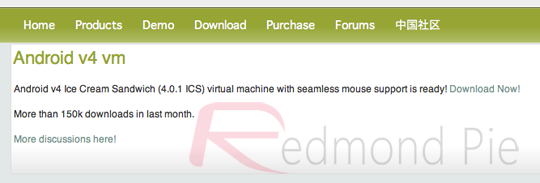
Step 3: Head on over to the VMLite website and download a copy of the Ice Cream Sandwich which has been preconfigured for virtualization and features seamless mouse support for navigation. The download weighs in at 88MB in size so may take a while to download depending on your connection.
Step 4: Locate the downloaded ‘Android-v4.7z‘ file and extract the contents from within.
Step 5: Once the Android-v4.7z file has been opened, locate a file from within the archive called ‘Android-v4.vbox‘ which as you can tell by the file extension is a pre configured VirtualBox file.
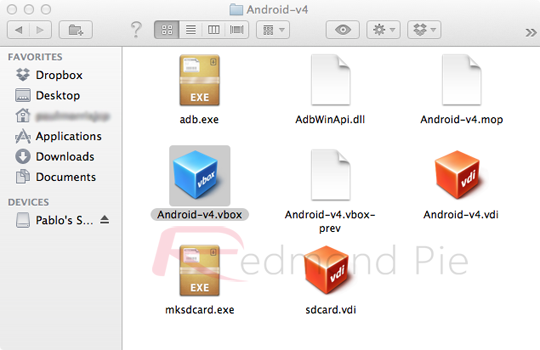
Step 6: Double click on the Android-v4.vbox file which will load the VirtualBox application and boot up the ICS file.
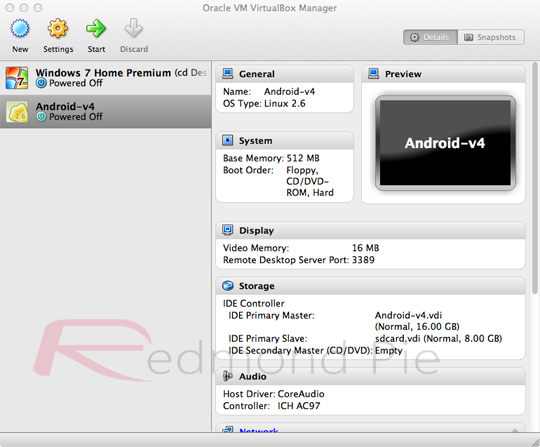
Step 7: When the boot menu is presented in VirtualBox, press ‘start‘ on the top toolbar and then if required select the ‘Android Startup from /dev/sda‘ option.
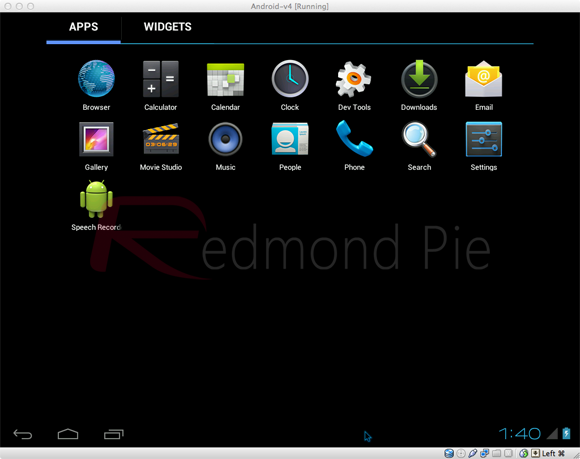
Step 8: All steps are complete. Android 4.0 ICS should now be booting up allowing you to enjoy that Android goodness.
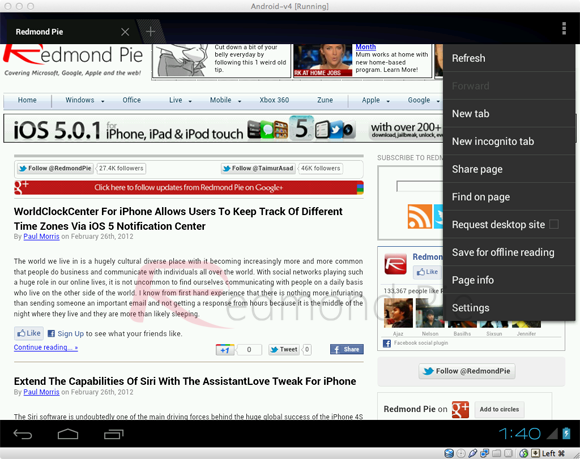
Windows and Linux users may find that an alternative, specific version Android 4.0 may be required, which can be found by visting the Android-x86 page. The performance of the Android ICS virtual installation will obviously not be as smooth as intended on an actual device built for purpose, but it does give a feel of the OS with apps being able to launch as well as widget customization.
About Me
 Howdy,World
I am an internet wreck who keep surfing the net to find the answers of the questions that i encounter,and if i get a satisfactory answer than that thing goes on this website so that if same question strikes you then you need not search the web for that.So in short we try to make your lives simpler and more advanced in the possible way we can.
WE ARE YOUR TECHNOLOGY GUIDE
Howdy,World
I am an internet wreck who keep surfing the net to find the answers of the questions that i encounter,and if i get a satisfactory answer than that thing goes on this website so that if same question strikes you then you need not search the web for that.So in short we try to make your lives simpler and more advanced in the possible way we can.
WE ARE YOUR TECHNOLOGY GUIDE Advertisement

