


.jpg)


10 Web Browsers You Probably Haven’t Heard Of
Firefox. Internet Explorer. Chrome. Safari. Opera. We’ve pretty much all heard of them by now. They’ve been fighting for market share for the past few years (Internet Explorer has been fighting for it for a lot longer than that), and it’s unlikely any of them will ever come out the absolute winner. They try to be all things to all people. And that’s great.
Except…
What if you’re looking for a browser that does just the things you want to do online? What if you’re sick of all the browser-war hubub and want something that’s truly unique and different (and, maybe, works better than the mainstream options)? What then?

Well, there’s good news. There are more than a dozen excellent alternative browsers out there if you’re looking for something distinctive. Below are ten such web browsers, along with why you might want to consider using them.
1. Stainless
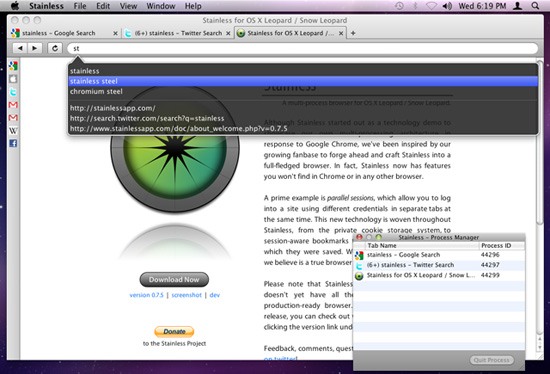
Stainless is a browser created in response to Google Chrome. It utilizes multi-processing architecture like Chrome (which, at the time of inception, wasn’t available for OS X), but also has some excellent features not found in other browsers. One of the most interesting features is the ability to log into one website using two different accounts in separate tabs.
Why you should consider it: The ability to log into a site with different credentials in different tabs makes this an excellent option for many. It’s especially useful if you have, say, work-related Gmail accounts and personal Gmail accounts.
Current release version: 0.7.5
Operating systems supported: OS X Leopard and Snow Leopard.
2. Maxthon
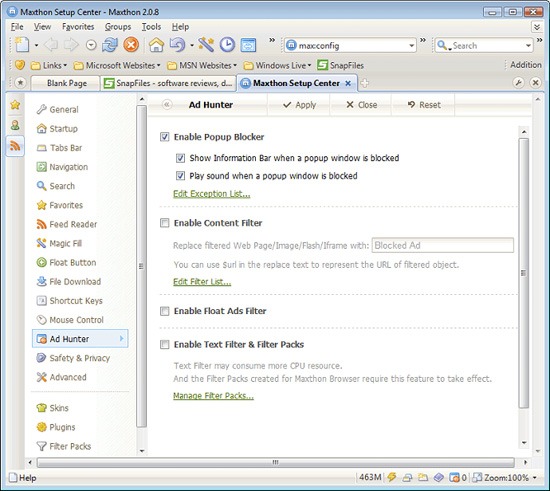
Maxthon is a highly configurable browser that places an emphasis on security. It has a built-in Ad Hunter that blocks most ads, as well as security features to prevent spyware, malware, and viruses. It lets you fully customize your browsing experience (you can choose between using menus, hot keys, word aliases, toolbars, or mouse gestures, plus there are more than 1,400 plug-ins to add functionality). It has filters available to block irritating or offensive content.
Other Maxthon features include a built-in screen capture tool, URL aliases for faster surfing, a built-in feed reader, an online favorites service, advanced proxy rules, and an anti-freeze feature.
Why you should consider it: If you want a customizable browser, Maxthon might be what you’re looking for; it’s built specifically for power users. Between plugins, skins, filter packs, and other customizable features, it truly lets you personalize your browsing experience. For parents concerned about their children’s’ activities online, the filters for blocking content can be reassuring.
Current release version: 2.5.11 (the Classic Version is also available: 1.6.5)
Operating systems supported: Windows
3. Sleipnir
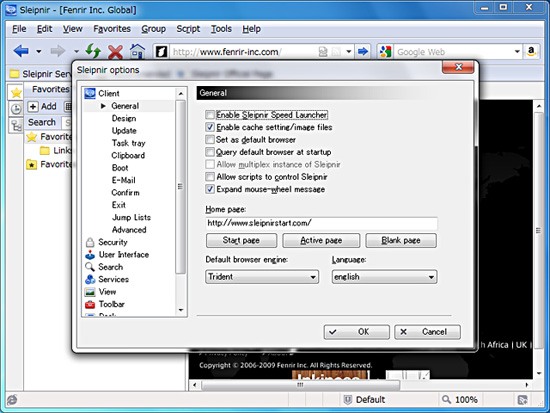
Sleipnir is very popular in Japan with a majority share in the country. It’s a profoundly customizable browser that maintains speed and performance despite customizations. There are skins and plugins available for it, letting you change the design and settings of the browser to suit your needs. And as all good browsers should, it stresses on security and usability, and allows for tabbed browsing.
Why you should consider it: Sleipnir is an option if you want a highly customizable browsing experience.
Current release version: 2.9.2
Operating systems supported: Windows 98 and newer
4. Swiftfox

Swiftfox is an optimized build of Firefox that’s faster and more cutting edge than the regular Firefox distribution. It works with Firefox plugins, making it remarkably extensible. The overall user interface is similar to Firefox, but is a bit more minimalist and clutter-free. Most other features are in line with what Firefox has to offer.
Why you should consider it: If you love Firefox but want something faster and lighter, then Swiftfox is your best bet.
Current release version: 3.5.6
Operating systems supported: Linux
5. Lunascape

Lunascape is the world’s first and only triple engine browser. That’s right: it’s a hybrid browser that runs on Gecko, Trident, and WebKit. It supports plugins and add-ons from Firefox, Internet Explorer, as well as their own plugin platform. It’s touted to be faster and lighter than many other browser options.
Why you should consider it: If you find yourself constantly switching back and forth between browsers (either for cross-browser testing of web designs or because of add-ons available only to Firefox or Internet Explorer), Lunascape is a perfect fit for you.
Current release version: 6.0.1
Operating systems supported: Windows
6. Konqueror
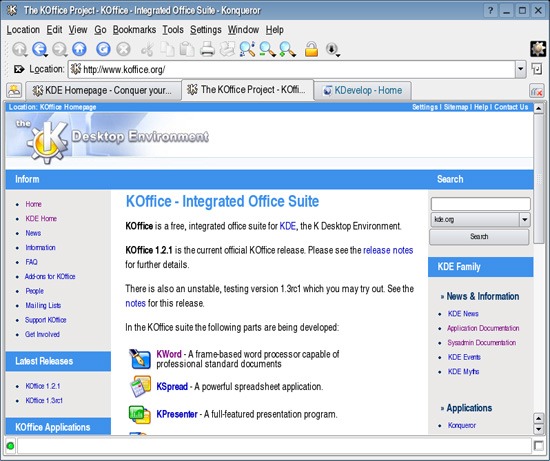
Konqueror combines web browsing, local and remote file management, and a universal viewing app that lets you view documents without having to launch other programs. It’s open source and HTML 4.01 compliant. It embraces Netscape plugins (like those for Flash or RealVideo). Konqueror also has a built-in FTP and WebDAV support.
Why you should consider it: If you’re a Linux user who wants a browser that can multitask, then Konqueror is definitely something to look into. It’s especially useful for those who want to be able to manage files right from within their browser.
Operating systems supported: Linux
7. SeaMonkey
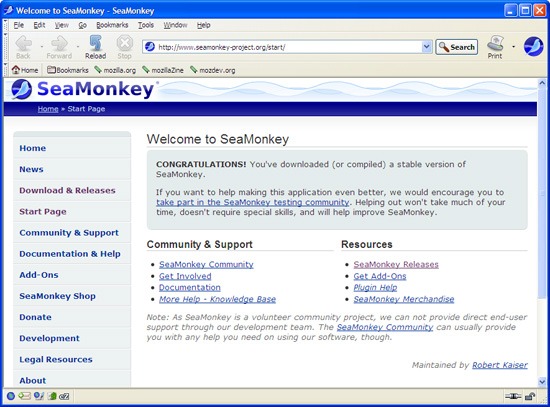
SeaMonkey is developed by Mozilla and is an “all-in-one” internet suite of apps. While the browser within SeaMonkey is pretty standard (and not unlike Firefox), what sets it apart is that it has integrated email, newsgroups, an HTML editor, IRC Chat, and web development tools. The mail feature offers tabbed reading and supports tagging and alternate views for better email finding and reading. The HTML editor renders CSS and gives you dynamic image and table resizing. For web developers, you can take advantage of the JavaScript debugger and a DOM inspector.
Why you should consider it: For developers and designers, SeaMonkey has a plethora of useful built-in features. It’s also a great option for people who like to run the bare minimum number of apps.
Current release version: 2.0.1
Operating systems supported: Windows 2000 and newer, Mac OS X 10.4 and newer, and Linux.
8. OmniWeb
OmniWeb is a WebKit browser created by the same people who created OmniGraffle and OmniOutliner. It aims to be fun and easy to use (like other Omni products) and shares a similar user interface. It has all the standard browser features we’ve come to expect (including tabbed browsing, bookmarks, and ad blocking), but also includes Workspaces, which lets you save browsing sessions to open later and includes an auto-save option and a built-in RSS reader.
Why you should consider it: For Mac users who want a browser that’s efficient and easy to use, OmniWeb might be just what you’re looking for. It’s appropriate for power users too, and the Workspaces feature is especially handy.
Current release version: 5.0.1
Operating systems supported: Mac OS X 10.4.8 or newer
9. Camino
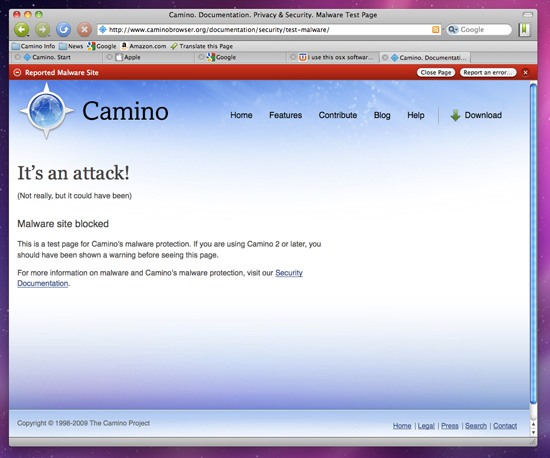
Think of Camino as a Firefox build specifically for Macs, built on the Gecko 1.9 rendering engine. It includes phishing and malware protection, tabs (including a tab overview function that lets you see all your open tabs at once), “annoyance blocking” (which blocks ads, pop-ups, and Flash animations), Keychain support (to save your browsing credentials), and download notifications. It also includes AppleScript support, feed detection, session saving, recently closed tabs, and full keyboard access.
Why you should consider it: Camino is a great browser for Mac users who like Firefox but want something built specifically for the Mac.
Current release version: 2.0
Operating systems supported: Mac OS X 10.4 or newer
10. Flock
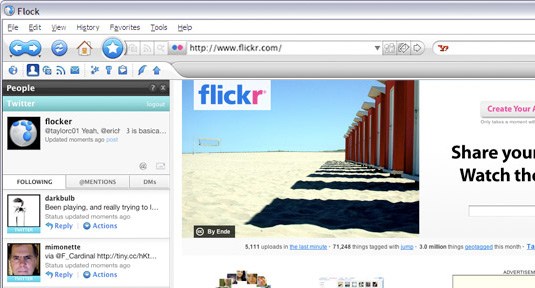
Flock is probably better known than many of the other browsers above, especially if you’re a social media addict. Flock was created specifically to make managing your social media activities easier from within your browser.
Flock focuses on staying connected through social media by making sharing and publishing things easier. It integrates directly with Facebook, Gmail, Digg, YouTube, MySpace, Flickr, Twitter, WordPress, Blogger, Delicious, Bebo, TypePad, Picasa, and more. Special features include a People sidebar, a Media bar (to browse photos and videos from your favorite sites), a built-in feed reader, a photo uploader, a blog editor, and more. There are also extensions and custom themes available for download.
Why you should consider it: Flock is a great choice for social media power users who want to be able to connect with all their social media accounts from one place.
Current release version: 2.5
Operating systems supported: Windows, Linux, Mac OS X
iBoot + MultiBeast: Install Mac OS X on any Intel-based PC

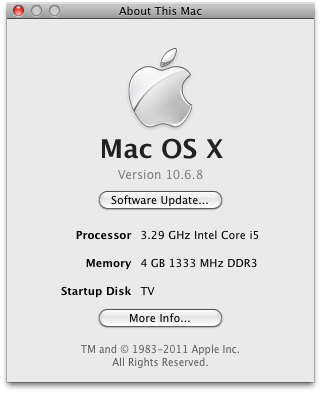
Any OSx86 installation guide can seem daunting at first glance, especially when trying to remember cryptic terminal commands and sorting through volumes of misinformation on the web. This guide requires no coding, terminal work, or Mac experience of any kind. You will not need access to a Mac. In fact, it’s easier and faster for me to install Snow Leopard with fully working components on my system than it is to install Windows 7. And more fun.
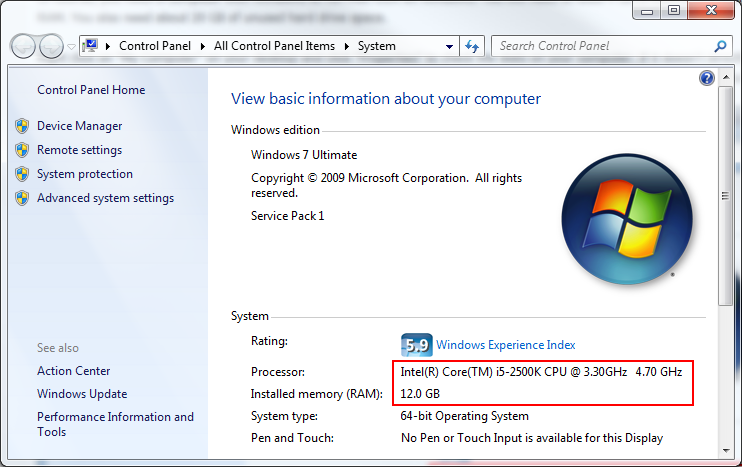
The iBoot + MultiBeast method is designed and tested for any desktop or laptop running the latest line of Intel processors, the Core i3/i5/i7s. I have had reports of success with older machines as well including CoreDuo, Core2Duo, and even Pentium 4. However, AMD processors are not supported.
BEFORE YOU BEGIN
- If you have greater than 4gb of RAM, remove the extra RAM for a maximum of 4gb. You can put back any extra RAM in after the installation process.
- Use only 1 graphics card in the 1st PCIe slot with 1 monitor plugged in.
- Remove any hard drives besides the blank drive being used for OS X.
- Remove any USB peripherals besides keyboard and mouse.
- Remove any PCI cards besides graphics- they may not be Mac compatible.
- If using a Gigabyte 1156 board, use the blue Intel SATA ports- not the white Gigabyte SATA ports.
- It’s best to use an empty hard drive- you will have to partition and format the drive.
- Always back up any of your important data.
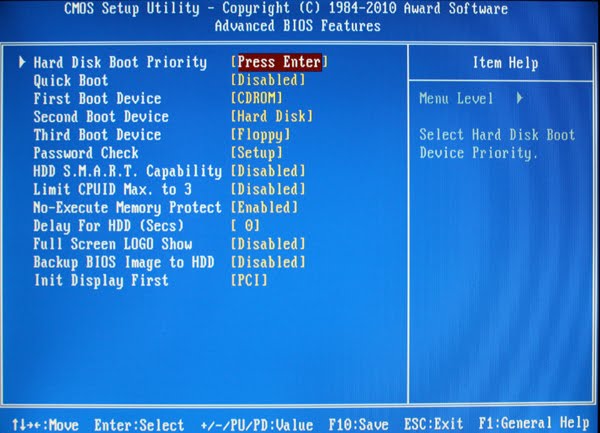
- STEP 1: BIOS SETTINGS
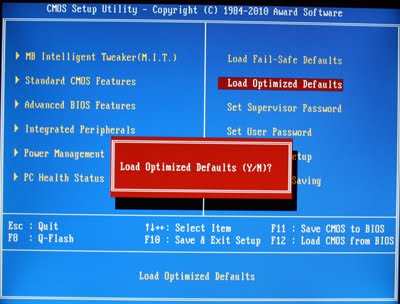
You will need to set your BIOS to ACHI mode and your Boot Priority to boot from CD-ROM first. This is the most important step, and one many people overlook. Make sure your bios settings match these. It’s not difficult- the only thing I did on my Gigabyte board besides setting Boot Priority to CD/DVD first was set Optimized Defaults, change SATA to AHCI mode, and set HPET to 64-bit mode.


STEP 2: INSTALL MAC OS X
In order to boot the Mac OS X Retail DVD, you’ll need to download and burn iBoot. For desktops and laptops using unsupported Intel CPUs and graphics, a legacy version of iBoot can be downloaded here.
- Download iBoot
- Burn the image to CD
- Place iBoot in CD/DVD drive
- Restart computer
- At boot prompt, eject iBoot

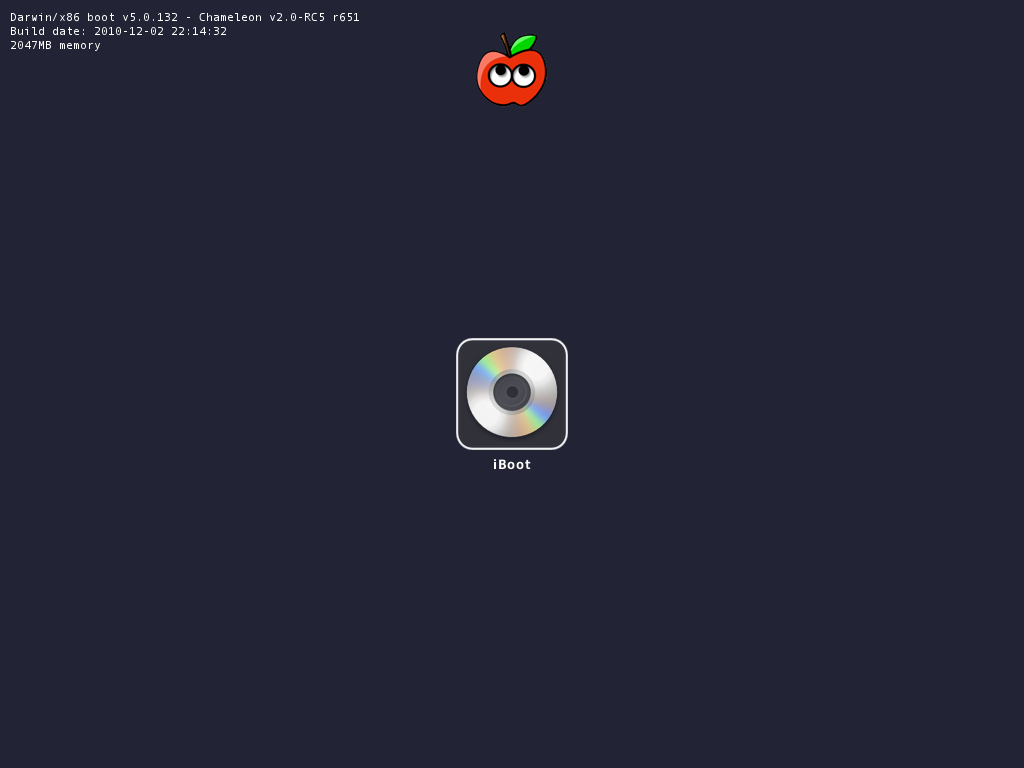
- Insert your Mac OS X Snow Leopard Retail DVD and press F5
- When you see the screen below, press enter to begin the boot process

- When you get to the installation screen, open Utilities/Disk Utility. NOTE: If you cannot get to the installation screen, retry from Step 4, type PCIRootUID=1 before hitting enter. If that doesn’t work then try PCIRootUID=1 -x or just -x which will enter Mac OS X Safe Mode and will allow you to proceed. For some graphics cards, use GraphicsEnabler=No boot flag to proceed.
- Partition your hard drive to GUID Partition Table
- Format your hard drive to Mac OS Extended (Journaled). NOTE: The bootloader can only boot from a disk or partition of 1 TB or less. Partition larger drives.
- For the purposes of this guide, name it Snow Leopard. You can rename it later.
- Close Disk Utility
- When the installer asks you where to install, choose Snow Leopard
- Choose Customize‚ and uncheck additional options. This will hasten the install process. You can always install this stuff later.
- Restart computer.
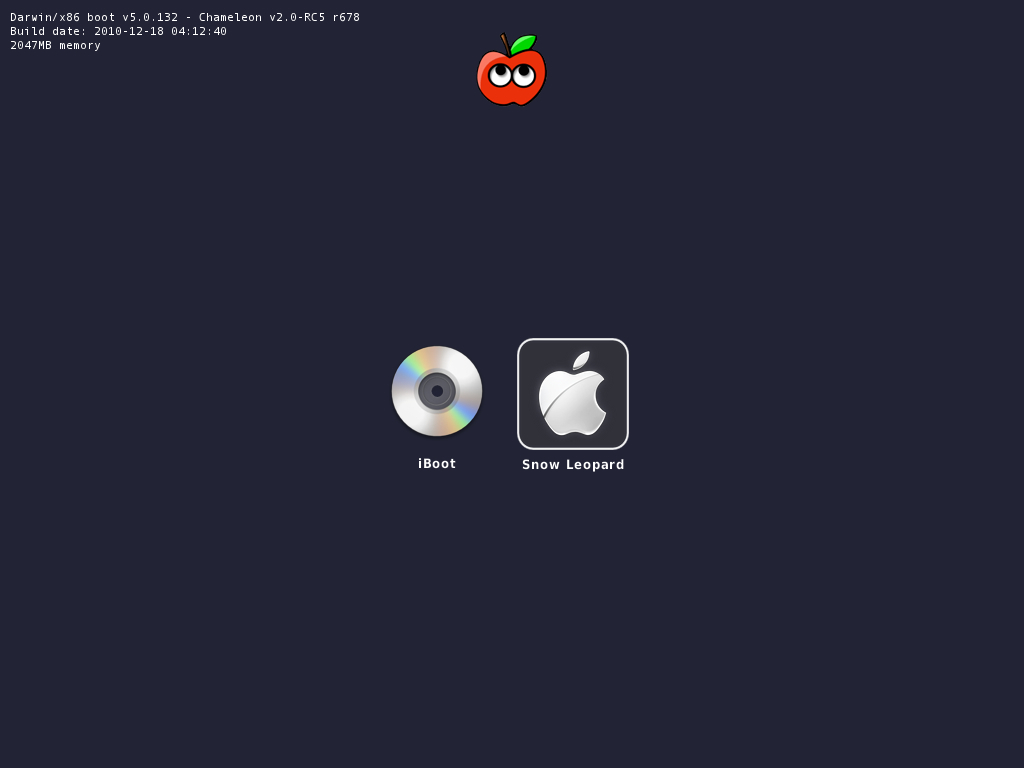
- Place iBoot back in drive.
- When you get to the boot selection screen, choose your new Snow Leopard installation.

- View the super-cool Mac OS X Snow Leopard Welcome Video, and set up your computer!


TEP 3: UPDATE TO 10.6.8
If you have a Sandy Bridge system, please follow these specialized instructions to update to 10.6.8.
- Open Finder and navigate to your Snow Leopard drive.
- Download the Mac OS X 10.6.8 Combo Update
- Download MultiBeast
- Open MultiBeast- don’t run it yet, just leave it open. Set up windows as shown.

- Mount MacOSXUpdCombo10.6.8.dmg
- Install MacOSXUpdCombo10.6.8.pkg
- Upon completion, the installer will ask you to reboot. DO NOT REBOOT.
- Switch to the already open MultiBeast. If it closes, just re-open it.
STEP 4: MULTIBEAST


MultiBeast is an all-in-one post-installation tool designed to enable boot from hard drive, and install support for Audio, Network, and Graphics. It contains two different complete post-installation solutions: EasyBeast and UserDSDT. In addition it includes System Utilities to rebuild caches and repair permissions and a collection of drivers, boot loaders, boot time config files and handy software.
Choose one of the following options directly following a fresh installation and update:
EasyBeast is a DSDT-free solution for any Core/Core2/Core i system. It installs all of the essentials to allow your system to boot from the hard drive. Audio, Graphics and Network will have to be enabled separately.
UserDSDT is a bare-minimum solution for those who have their own pre-edited DSDT. Place your DSDT.aml on the desktop before install. Audio, Graphics and Network will have to be enabled separately. HINT: Check the DSDT Database for a pre-edited DSDT.
- Run MultiBeast.
- If you have a custom DSDT that’s been edited, place the file on your desktop and choose UserDSDT.
- All others select EasyBeast
- Select System Utilities.
- Optionally, you may install further drivers via Advanced Options to enable ethernet, sound, graphics, etc… Be sure to read the documentation provided about each installation option. NOTE: EasyBeast, and UserDSDT install the bootloader by default, so you’ll not need to check that option.
- Install to Snow Leopard- it should take about 4 minutes to run scripts.
- Eject iBoot.
- Reboot- from your new Snow Leopard installation drive.

Congratulations! You’re done!!
Your PC is now fully operational, while running the latest version of Mac OS X Snow Leopard! And you have a nice Boot CD to get into your system in case things go awry. Boot your system from iBoot if you have issues. You may run MultiBeast as often as you like.
If you can’t boot, try typing -x at the boot prompt to enter safe mode, or just boot with iBoot. When you get to the desktop, you can make all of the changes you need to. The best way to start fresh is delete whatever you’re trying to get rid of- including the whole /Extra folder, as most kexts are installed there. Then you can re-run MultiBeast. As long as you rebuild caches and repair permissions after you’re done, you can do just about anything you want to /Extra/Extensions and /System/Library/Extensions. Anything can be tweaked and enabled upon subsequent uses of MultiBeast.
If you’ve had success using iBoot + MultiBeast, consider a contribution to help keep the sites going. We’re constantly updating and tweaking our tools to help you.
Thanks in advance!
-tonymacx86 & MacMan
For our most current workarounds and solutions for issues such as USB and audio, check out the Mac OS X 10.6.3 Update, Mac OS X 10.6.4 Update, Mac OS X 10.6.5 Update, Mac OS X 10.6.6 Update, Mac OS X 10.6.7 Update, and Mac OS X 10.6.8 Update articles. Good luck, and see you on the forum!
Related Posts: Dual Boot Windows 7 and OS X Snow Leopard

How to install Mac OS X Lion in Virtualbox [Windows]

For the unacquainted, distros are pirated copies of Mac OS X that have been modified to work with normal computers. Right now, using a distro is the only practical method for getting Mac OS X Lion to run a virtual machine in Windows.
- Virtualbox : This virtualization suite is free, and though it doesn’t offer official support for Mac OS X, it works well enough.
- iAtkos : This is a popular distro of Mac OS X Lion. I won’t go into details, but you can download it from just about any bittorrent website by using a bittorrent client (it’s about 4 GB in size). Unlike the retail version of Lion, you don’t have to use a boot CD like iBoot to start the Mac OS X installer.
Step 1: Prep
Be sure to choose 64-bit and not 32-bit, because Mac OS X Lion only works with 64-bit. Choosing 32-bit will result in a critical “Guru Meditation” error later on.

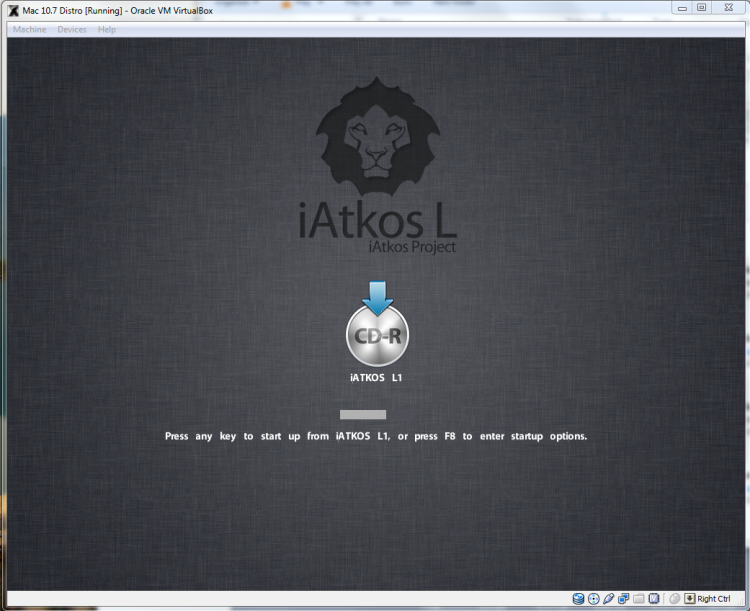
Press enter to startup the Lion installer.
Continue, and you will eventually come up to a page that asks you for a “destination” for your Mac install. Oh no, the page is blank! We’ll have to fix that. To do this, start up Disk Utility (located under the Utilities menu).
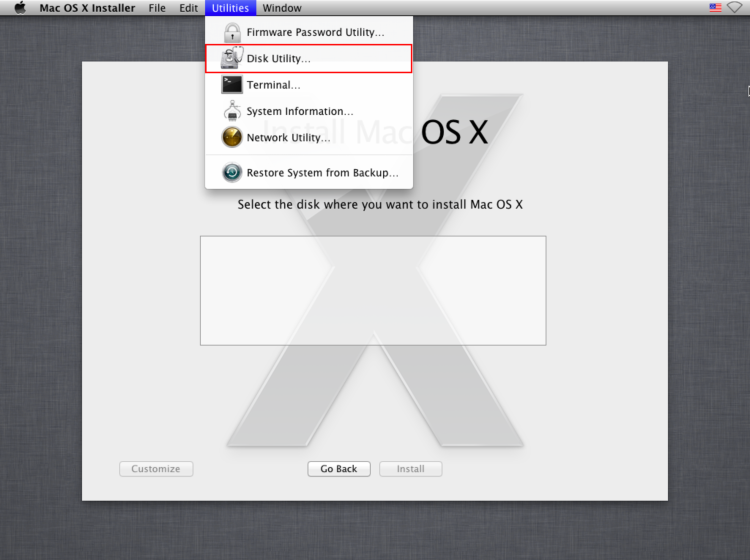
Mac OSX can only be installed on a completely clean disk, so you need to use Disk Utility to wipe your Virtualbox hard disk. Click on the Virtualbox hard disk in Disk Utility and erase it. Don’t worry, there’s nothing important on it.
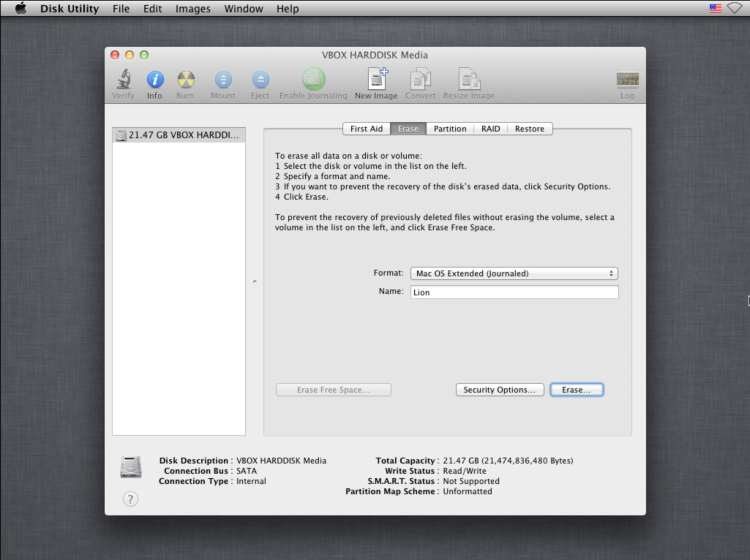
On the installation page for Mac OSX, the Virtualbox hard disk should now be showing up. Select it and continue.

Once that’s done with, Mac OSX will install itself. This will take at least 20 minutes.

When the installation finishes, Mac OS X will crash. This is normal.

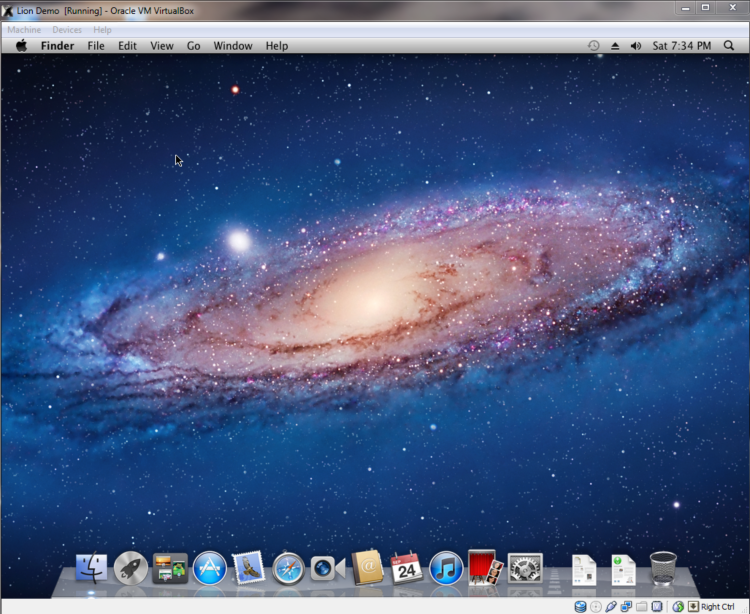
Restart your virtual machine, eject iAtkos from your virtual DVD drive. To eject iAtkos, right-click on the CD icon at the bottom right of the Virtualbox window, and un-check the iAtkos DVD. (The below screenshot is different because it’s taken from my Snow Leopard guide, but it should look something like that.)

After ejecting the iAtkos CD, restart your virtual machine again. Now, at the bootup screen, you’ll see an icon for the hard drive where you installed Lion. Select it (use the arrow keys on your computer) and press “Enter”. Lion will boot, and you should eventually be led to the Mac OS X setup screen. Fill it out, then mission accomplished!
Though this step is optional, I still recommend you do it anyways. Anyways, when you first use your Mac OS X, you’ll probably notice one thing: your screen resolution is 1024×768. Since Virtualbox doesn’t “technically” support Mac OS X, there’s no official way to change this. But here’s how you can change it anyways:

You can change “1920x1080x32″ to whatever resolution best fits your monitor. For instance, if you want to use the 1600×900 resolution, type in “1600x900x32″. Once you’ve saved it, turn off the virtual machine.
Next, open the Command Prompt in Windows. You can do this by opening the Start Menu, and typing “command prompt” into the Start Menu search bar. Then, type the following command into the Command Prompt.
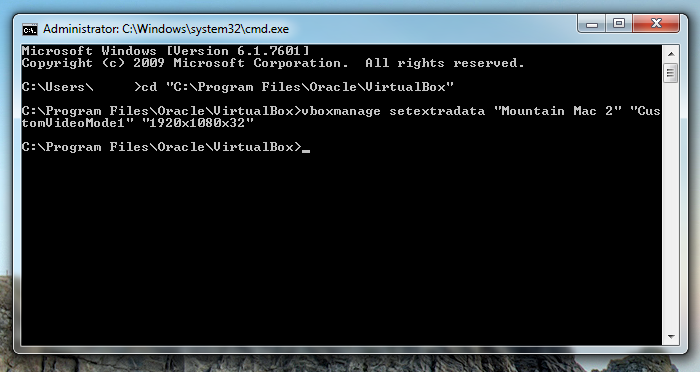
cd “C:\Program Files\Oracle\Virtualbox”
This command will change the focus of the Command Prompt to the program folder for Virtualbox (if you installed Virtualbox somewhere different, then change the command to wherever you installed it). Next, type in this command:
vboxmanage setextradata “Name of virtual machine” “CustomVideoMode1″ “1920x1080x32″
This command activates “vboxmanage”, a command-line program included with Virtualbox that allows you to edit the properties of your virtual machine, including its built-in resolutions. Replace “Name of virtual machine” with the name of your virtual machine (in the screenshot below, my virtual machine is named “Mountain Mac 2″). Replace “1920x1080x32″ with whatever resolution you’re using.
Once that’s done, start your virtual machine again. It will now boot in full resolution. Congrats!

I’ll just repeat what I said in my Snow Leopard guide. Installing Mac OS X on a virtual machine is excellent practice for the real thing: installing Mac OS X on your actual computer. Don’t get too comfortable, though. Compared to most computers, Virtualbox virtual machines are very “vanilla”, meaning that they’re very compatible with Mac OS X in the first place. After all, sound and ethernet work from the start. You can’t count on being that lucky with a real PC.
And even if you don’t plan on doing this for real, with a Hackintosh, it’s still a really cool thing to try out over the weekend.
About Me
 Howdy,World
I am an internet wreck who keep surfing the net to find the answers of the questions that i encounter,and if i get a satisfactory answer than that thing goes on this website so that if same question strikes you then you need not search the web for that.So in short we try to make your lives simpler and more advanced in the possible way we can.
WE ARE YOUR TECHNOLOGY GUIDE
Howdy,World
I am an internet wreck who keep surfing the net to find the answers of the questions that i encounter,and if i get a satisfactory answer than that thing goes on this website so that if same question strikes you then you need not search the web for that.So in short we try to make your lives simpler and more advanced in the possible way we can.
WE ARE YOUR TECHNOLOGY GUIDE Advertisement

